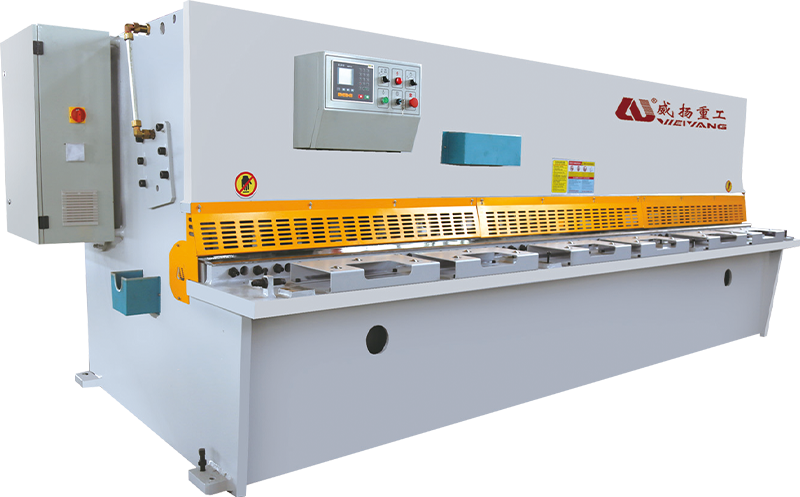
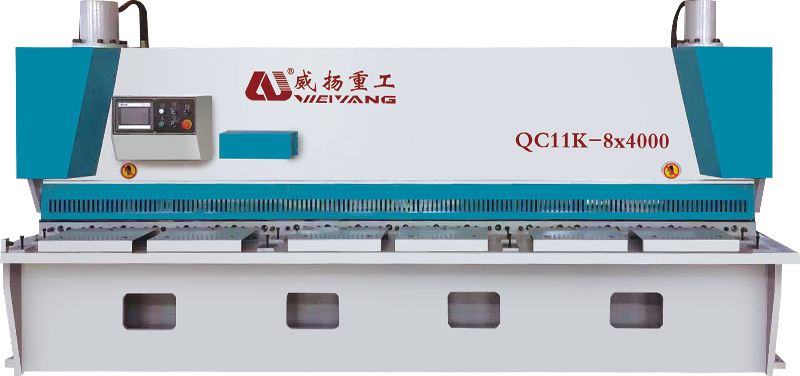
How to adjust the blade gap of hydraulic shearing machine?
Understanding the Importance of Correct Blade Gap in Hydraulic Shearing Machines
In a hydraulic shearing machine, the blade gap is one of the most influential parameters in determining cutting precision, operational efficiency, and long-term equipment reliability. The blade gap is defined as the distance between the upper and lower blades during the shearing process. While this measurement is often only a fraction of a millimeter, it has a direct and measurable impact on the quality of the finished workpiece, the life of the blades, the load on the hydraulic system, and even the safety of the operator. The physics behind shearing involves concentrating force along a linear edge to fracture and separate material. If this force is not applied in the correct manner due to an improper blade gap, the cutting process becomes inefficient and potentially damaging.
A correctly adjusted blade gap ensures that the material is subjected to the right amount of shear stress without excessive deformation. If the gap is too narrow, the blades may press into the material rather than shearing it cleanly, causing edge galling, excessive heat generation, and accelerated blade wear. The additional friction also increases hydraulic pressure requirements, which in turn strains pumps, valves, and seals. This can lead to premature hydraulic system failures, higher maintenance costs, and unplanned production downtime. On the other hand, if the gap is too wide, the blades lose their ability to apply a concentrated cutting force, which results in tearing rather than clean shearing. This leads to rough edges, heavy burr formation, and dimensional inaccuracies in the cut pieces, all of which require secondary finishing operations, consuming additional labor and time.
Material type and thickness are primary factors that dictate the correct blade gap setting. Soft, thin materials like aluminum or copper require a very narrow gap to achieve a smooth finish, whereas harder, thicker materials like high-tensile steel need a larger gap to accommodate the material’s resistance to shearing. Many equipment manufacturers provide detailed charts specifying the recommended gap as a percentage of the material thickness, typically ranging from 5% to 10%. These values are derived from extensive testing and are meant to balance cutting quality with blade longevity. However, in real production environments, variations in material hardness, surface finish, and internal stress mean that operators must sometimes fine-tune these settings to achieve optimal results. Skilled technicians often develop a feel for the right gap through years of experience, listening to the cutting sound, observing the sheared edge, and monitoring machine load.
The importance of correct blade gap extends beyond just the immediate cutting quality. It directly influences production efficiency. In high-throughput operations, where thousands of sheets are processed daily, even minor inefficiencies can accumulate into significant losses. A misadjusted blade gap that slows the cutting cycle by just a fraction of a second per sheet can, over the course of a shift, translate into hours of lost productivity. Moreover, reworking poorly cut sheets introduces additional handling, increases scrap rates, and disrupts workflow schedules. By maintaining the correct blade gap, operators ensure smoother material flow, consistent cycle times, and predictable output quality, all of which are crucial for meeting production targets in industries such as automotive manufacturing, shipbuilding, and structural steel fabrication.
Operator safety is another critical reason for ensuring correct blade gap settings. When the gap is incorrect, material may shift unpredictably during cutting, causing sudden releases or kickbacks. This can expose the operator to risks such as pinch points, flying debris, or uncontrolled material movement. Hydraulic shearing machines operate with immense force, and any unexpected behavior in the workpiece can have serious consequences. A proper blade gap minimizes these risks by ensuring stable material engagement throughout the cut. Additionally, correct adjustment reduces the likelihood of blade binding or jamming, which can occur when the gap is too narrow, forcing the machine to stop abruptly and requiring manual intervention—another potential safety hazard.
Energy efficiency is also tied to blade gap accuracy. A properly set gap allows the hydraulic system to work within its designed pressure range, minimizing energy consumption per cut. When the gap is too small, the machine must exert higher pressure to complete the cut, increasing power draw and generating excess heat in the hydraulic fluid. This not only raises energy costs but also accelerates the breakdown of hydraulic oil, necessitating more frequent changes and filter replacements. Over years of operation, the difference in energy consumption between an optimally adjusted gap and a poorly adjusted one can amount to substantial cost savings, especially for facilities running multiple machines in continuous operation.
The blade gap also affects the wear rate of the blades themselves. Every cutting cycle subjects the blade edges to high contact forces. If the gap is incorrect, these forces become unevenly distributed, causing localized chipping, micro-cracking, or edge deformation. Over time, this leads to more frequent sharpening or replacement, increasing consumable costs and machine downtime. In severe cases, incorrect gap settings can damage the blade mounting system, requiring expensive repairs or replacements of mounting components. For this reason, maintaining the correct blade gap is part of preventive maintenance schedules in well-managed fabrication shops. Regular measurement and adjustment can extend blade life significantly, reducing operational expenses and maintaining consistent cutting quality.
In industries with strict dimensional and surface finish requirements, such as aerospace, defense, and high-end architectural fabrication, the consequences of an incorrect blade gap are even more pronounced. In these applications, edge quality is not just a matter of appearance—it directly affects the functionality and structural integrity of the finished part. A poorly cut edge can create stress concentrations that may lead to premature failure under load. Furthermore, if parts do not meet tolerance requirements due to poor shearing, they may be rejected outright, leading to wasted material and lost production time. Maintaining the correct blade gap ensures compliance with customer specifications and regulatory standards, avoiding costly rejections and preserving client trust.
From a process control perspective, the blade gap is a variable that must be monitored and documented in quality assurance procedures. Many advanced hydraulic shearing machines are now equipped with digital gap indicators or automated gap adjustment systems that allow for precise, repeatable settings. These systems store gap presets for different materials and thicknesses, reducing setup time and eliminating operator guesswork. In facilities without such automation, manual adjustment requires careful measurement using feeler gauges or dial indicators, combined with test cuts to verify performance. Regardless of the method used, understanding the functional importance of the gap ensures that it is treated as a priority parameter rather than an afterthought.
Environmental considerations are also linked to blade gap accuracy. By reducing burr formation and eliminating the need for secondary grinding or deburring, correctly set gaps help minimize dust and particulate generation in the workshop. This contributes to a cleaner working environment and reduces the load on dust extraction systems. Additionally, minimizing rework and scrap production has a positive impact on material utilization rates, supporting sustainability goals in modern manufacturing operations.


Identifying the Key Factors That Influence Optimal Blade Gap Settings
When setting up a hydraulic shearing machine for precise and efficient operation, one of the most critical adjustments is determining the optimal blade gap. The blade gap directly affects cutting quality, blade life, hydraulic system load, and overall production efficiency. However, the correct gap setting is not a fixed number—it depends on a combination of material characteristics, machine condition, and operational requirements. Identifying these factors and understanding how they interact is essential for achieving consistent, high-quality cuts.
One of the most influential factors is material thickness. In general, thicker materials require a larger blade gap because they produce more resistance during shearing and need more space for the material to fracture cleanly. If the gap is too small for thick materials, the cutting edges experience excessive friction and compression, increasing blade wear and stressing the hydraulic system. Conversely, for thin materials, a gap that is too wide will cause the material to bend or roll before it shears, resulting in rough, irregular edges. Manufacturers typically provide recommended gap charts that suggest setting the blade gap as a percentage of the material’s thickness—often between 5% and 10%. These values provide a starting point, but real-world conditions may require fine adjustments.
Another critical parameter is material hardness. The harder the material, the more force is required to shear it, and the gap must be adjusted accordingly. For example, high-carbon steel or hardened stainless steel needs a larger gap than softer metals like aluminum or copper of the same thickness. Hard materials are less forgiving of incorrect gap settings—too narrow a gap can cause blade chipping or micro-cracking, while too wide a gap can result in tearing and significant burr formation. Operators must also consider material tensile strength, which influences how the material deforms and fractures under shear stress.
Material surface condition also plays a role. Sheets with coatings, laminations, or protective films may require slightly different gap settings to avoid delamination or peeling during cutting. Similarly, materials with rough mill finishes or surface irregularities may need adjustments to prevent the blade from catching or dragging. For precision-finished materials, a correct gap is essential to preserve the surface integrity and avoid introducing scratches or dents.
The type of blade material and its current wear condition are equally important. New, sharp blades can perform clean cuts with slightly smaller gaps, while worn blades require a larger gap to compensate for the rounded cutting edges. High-speed steel (HSS) blades maintain sharpness longer and are more tolerant of minor gap deviations, whereas carbide-tipped blades demand highly accurate gap settings to avoid chipping. Frequent inspections and blade maintenance schedules should be integrated into production routines to ensure that gap settings remain optimal as blades wear over time.
Machine rigidity and alignment are fundamental mechanical factors. If the shearing machine’s frame or blade holders are not perfectly aligned, even the correct nominal gap setting will produce inconsistent results across the cutting width. Wear in guideways, hinges, or hydraulic cylinder mounts can cause the gap to vary from one side of the machine to the other. This means that before making precise gap adjustments, the machine must be in good mechanical condition, with all structural and guiding components properly aligned and tightened.
Hydraulic system pressure directly influences the cutting force applied through the blades. If hydraulic pressure is too high relative to the set gap, the blades may dig too deeply into the material, increasing tool wear and potentially deforming the sheet. If the pressure is too low, the cut may be incomplete, leaving unseparated material fibers that require secondary trimming. Operators must ensure that pressure settings correspond to both the chosen gap and the material characteristics, as the two are interdependent.
Environmental factors, while often overlooked, can subtly influence the optimal gap. Temperature changes in the workshop can cause thermal expansion or contraction in both the blades and the frame, altering the effective gap size. This effect is especially relevant in facilities where machines operate continuously over long shifts, causing heat build-up in the hydraulic system and surrounding structure. Operators working in such environments should be aware that a gap set in the morning may need minor adjustments later in the day to maintain cutting precision.
Production requirements also affect gap settings. For high-volume cutting operations, maintaining a slightly larger gap can prolong blade life and reduce downtime for sharpening, even if it means tolerating slightly more burr formation. In high-precision applications, such as aerospace or medical component fabrication, a smaller gap may be required to achieve the necessary edge quality, despite the trade-off in blade life. The decision on gap size is therefore not purely technical—it involves balancing cost, speed, and quality priorities specific to each production run.
The operator’s experience remains a decisive factor in achieving the best results. While charts and guidelines provide a theoretical baseline, seasoned operators develop an intuitive understanding of how small changes in gap settings affect the cut. They can detect issues by listening to the sound of the shear, feeling the resistance through the machine’s controls, or inspecting the edge finish immediately after cutting. This skill enables quick adjustments without relying solely on trial-and-error measurements, improving overall efficiency.
In more advanced facilities, CNC-controlled hydraulic shearing machines are equipped with automated blade gap adjustment systems. These use servo motors, sensors, and control software to set the exact gap based on input parameters such as material type, thickness, and hardness. While automation reduces the need for manual adjustments, understanding the underlying factors that influence gap settings remains important. If automated systems fail or produce unexpected results, operators must still be able to manually diagnose and correct the problem.
Preventive maintenance plays an indirect but vital role in sustaining correct gap settings. Regular lubrication of moving parts, inspection of hydraulic seals, checking for frame deformation, and ensuring proper blade mounting torque all contribute to maintaining consistent gap performance. Neglecting these maintenance tasks can lead to progressive machine wear, which gradually shifts the effective gap away from its intended value, even if the adjustment mechanism has not been changed.
By carefully considering material properties, machine condition, blade type, hydraulic settings, and production goals, operators can identify and maintain the optimal blade gap for each cutting task. The interplay between these factors means that achieving the right gap is both a technical calculation and a practical skill, requiring knowledge, observation, and adjustment throughout the life of the machine.

Tools and Instruments Required for Accurate Blade Gap Adjustment
When setting the blade gap in a hydraulic shearing machine, precision is critical for maintaining consistent cutting quality, minimizing blade wear, and ensuring operational safety. Achieving this precision requires not only a thorough understanding of gap-setting principles but also the correct tools and instruments designed specifically for measurement, alignment, and adjustment. These tools help operators verify that the distance between the upper blade and lower blade is uniform along the entire cutting length and suitable for the specific material being processed. Below are the primary categories of tools and instruments needed for accurate blade gap adjustment, with detailed explanations of their function, application, and best practices.
1. Feeler Gauges for Direct Gap Measurement – Feeler gauges are one of the most essential tools for setting the blade gap. They consist of a series of thin, precisely machined metal blades of varying thickness, each stamped with its measurement in millimeters or inches. When adjusting the gap, the operator inserts the appropriate feeler gauge between the blades to check if the clearance matches the desired value. For example, if cutting a 4 mm steel sheet and the recommended gap is 0.3 mm (around 7–8% of the thickness), the operator will use a 0.3 mm feeler blade to verify uniform clearance along the shear length. Feeler gauges must be made of hardened steel to resist deformation during repeated use, and they should be calibrated periodically to maintain accuracy. Proper use involves ensuring that the gauge slides between the blades with slight resistance, indicating the correct clearance without excessive force.
2. Dial Indicators for Parallelism Checks – While feeler gauges are excellent for spot measurements, they do not reveal if the blade gap is uniform from one end of the machine to the other. This is where dial indicators come in. A dial indicator, mounted on a magnetic base, can measure small variations in blade position with a resolution as fine as 0.01 mm. The operator can sweep the indicator along the cutting edge to ensure that both the upper and lower blades are perfectly parallel. If discrepancies are found, the machine’s blade mounting bolts or wedge mechanisms are adjusted until the reading remains consistent. Dial indicators are especially important after blade replacement or major maintenance, as any misalignment can lead to uneven wear and poor cutting performance.
3. Torque Wrenches for Blade Mounting Bolts – Proper torque application on the blade mounting bolts is essential for maintaining a stable gap setting. If bolts are over-tightened, they can distort the blade holder, altering the gap; if under-tightened, the blade can shift during operation, causing inconsistent cutting. Torque wrenches allow precise tightening to the manufacturer’s recommended specifications, usually expressed in Newton-meters (Nm) or pound-feet (lb-ft). Using the correct torque ensures that the blade remains fixed in position during cutting cycles while avoiding structural stress on the mounting components. High-quality torque wrenches should be recalibrated regularly to ensure accuracy.
4. Straightedges and Precision Rulers for Alignment Verification – Maintaining a straight and true cutting edge is essential for even blade contact. A precision-machined straightedge, often made from hardened steel or granite, is placed along the cutting surface to check for any bowing, twisting, or irregularities. Even slight deviations in straightness can create uneven gaps across the blade length, resulting in poor cutting performance. In addition, precision rulers with fine graduations allow for quick, approximate checks before more detailed measurements are taken with feeler gauges or dial indicators.
5. Digital Calipers and Micrometers for Blade Wear Assessment – Blade thickness changes over time due to wear and repeated sharpening. Digital calipers and micrometers allow operators to measure blade dimensions accurately, ensuring that wear is even and within tolerance. Uneven wear can lead to an inconsistent gap, making it necessary to shim one side of the blade or regrind it. Micrometers, with their higher resolution (often to 0.001 mm), are particularly useful for checking fine variations along the blade edge, ensuring precise adjustments in gap settings.
6. Laser Alignment Systems for High-Precision Applications – In facilities with high-precision cutting requirements, laser alignment systems can be used to ensure perfect blade parallelism and uniform gap settings. These systems project a laser beam along the length of the blade, allowing operators to detect even microscopic deviations in alignment. By combining laser readings with manual adjustments, the gap can be set to exact tolerances, improving consistency for demanding applications such as aerospace, defense, and medical equipment fabrication.
7. Hydraulic Pressure Gauges for System Load Monitoring – Blade gap adjustments are closely tied to the hydraulic system’s operational pressure. Pressure gauges help verify that the hydraulic force is within the recommended range for the chosen gap and material thickness. If the pressure is too high, it could indicate an overly narrow gap or excessive material resistance; if too low, it could point to a gap that is too wide or insufficient cutting force. Monitoring hydraulic pressure during test cuts helps operators fine-tune both the gap and system settings for optimal performance.
8. Shims and Spacer Blocks for Controlled Adjustments – In many hydraulic shearing machines, especially older mechanical designs, blade gap adjustment is made by inserting shims or spacer blocks between the blade holder and the machine frame. Shims are thin, precisely machined pieces of metal that can be stacked to achieve the desired gap. They allow for controlled, repeatable adjustments and are particularly useful when compensating for uneven blade wear. Spacer blocks, on the other hand, are thicker and used for larger adjustments during blade installation or major maintenance.
9. Protective Gear for Safe Adjustment Work – While not a measuring tool, personal protective equipment (PPE) is a critical part of any blade adjustment process. Operators should wear cut-resistant gloves when handling sharp blades, safety glasses to protect against flying debris during test cuts, and steel-toed footwear for protection in case of dropped components. PPE ensures that the process of checking and adjusting the gap—often involving close proximity to the cutting edge—is conducted with minimal risk of injury.
10. Manufacturer-Specific Adjustment Tools – Some modern hydraulic shearing machines come with proprietary adjustment tools designed to interface with the machine’s specific blade mounting and gap adjustment system. These tools may include custom wrenches, lever mechanisms, or digital setting devices that simplify the adjustment process and reduce the likelihood of operator error. Using these OEM tools is always preferable when available, as they are engineered to fit the machine precisely and follow the manufacturer’s recommended adjustment procedure.
Preparing the Hydraulic Shearing Machine Before Adjustment
Before performing any blade gap adjustment on a hydraulic shearing machine, it is essential to properly prepare both the machine and the workspace. Proper preparation ensures safety, accuracy, and efficiency, while minimizing the risk of damage to the machine or the material. Skipping or rushing through preparation steps can lead to uneven cutting, excessive blade wear, hydraulic system strain, and potential injury. The following points detail the necessary preparatory actions and considerations for accurately setting the blade gap on a hydraulic shearing machine, with emphasis on technical procedures and operational best practices.
1. Machine Shutdown and Lockout Procedures – Safety is the primary concern when working near cutting blades and hydraulic systems. Before beginning any adjustment, the machine must be completely powered down, and its hydraulic circuits depressurized. Operators should follow established lockout/tagout (LOTO) procedures, isolating the main power source and ensuring that the machine cannot be accidentally activated during adjustment. This includes turning off the main electrical panel, closing hydraulic valves if applicable, and using lockout devices to prevent inadvertent startup. Observing these procedures not only protects the operator but also prevents sudden movement of the blades that could damage the machine or the workpiece during setup.
2. Cleaning the Machine and Work Area – A clean machine environment is critical for precise adjustment. Before attempting to set the blade gap, operators should thoroughly clean the cutting area, removing debris, metal shavings, oil, and dust that may interfere with measurements or adjustment mechanisms. The blades themselves should be wiped down to remove any residue or oxidation, as even minor contaminants can affect feeler gauge readings or alignment checks. Cleaning ensures that measurements reflect the true clearance between the blades and prevents uneven wear due to trapped debris during test cuts.
3. Inspecting the Blades for Wear and Damage – Prior to adjustment, it is essential to inspect both the upper and lower blades for signs of wear, chipping, or uneven sharpening. A blade with irregular edges cannot achieve a consistent gap, even if the adjustment procedure is correctly followed. Operators should use micrometers or calipers to measure blade thickness along the length of the cutting edge, verifying uniformity. Any blades showing excessive wear or localized damage should be replaced or reground before attempting to set the gap. Checking the blade condition at this stage prevents inaccurate settings and protects the hydraulic system from unnecessary load caused by cutting with compromised blades.
4. Checking Blade Holder and Guideway Alignment – The mechanical alignment of the blade holders and guideways directly impacts the consistency of the gap. Operators should use dial indicators or straightedges to verify that the blade holders are parallel and properly seated. Misaligned holders can create a varying gap across the cutting length, resulting in poor edge quality or uneven cuts. Any mechanical deviations should be corrected before adjusting the gap, either by loosening and realigning mounting bolts, adjusting wedge mechanisms, or shimming components as required. Ensuring correct alignment at this stage provides a solid foundation for accurate gap measurement and minimizes the need for repeated adjustments.
5. Verifying Hydraulic System Condition – The hydraulic system must be fully functional and leak-free before attempting a gap adjustment. Operators should inspect hydraulic cylinders, hoses, seals, and fluid levels, looking for leaks, cracks, or pressure drops. A malfunctioning hydraulic system can prevent the blades from maintaining proper alignment during adjustment, leading to inaccurate readings and inconsistent cutting. Hydraulic pressure gauges should be checked to confirm that the system can achieve the recommended operational pressures for the material to be cut. Any irregularities in the hydraulic system should be corrected before proceeding, as blade gap adjustments made under unstable conditions will be unreliable.
6. Ensuring Proper Tool Availability – Accurate adjustment requires specific tools, including feeler gauges, dial indicators, torque wrenches, and shims. Before starting, operators should gather all necessary instruments, check their calibration, and confirm their condition. Using worn or inaccurate tools can compromise the precision of the gap adjustment. Ensuring that all required tools are ready and within reach streamlines the adjustment process and reduces interruptions, leading to more consistent results.
7. Reviewing Material Specifications – Knowing the characteristics of the material to be cut is crucial for determining the target gap. Operators should review material thickness, hardness, tensile strength, and surface condition, using these parameters to guide the adjustment process. For example, thicker high-tensile steel will require a larger gap than a thin aluminum sheet. Consulting manufacturer-recommended gap charts or CNC presets ensures that the adjustment is appropriate for the specific production requirements. Preparing this information in advance avoids guesswork and reduces trial-and-error adjustments that can waste time and damage blades.
8. Test Cut Planning – Planning for a test cut after adjustment is an essential step in preparation. Operators should select a piece of scrap material that matches the thickness and type of production material. This allows verification of the gap and blade performance without risking production parts. Preparing the test material and positioning it for easy placement in the shear ensures that adjustments can be evaluated immediately and refined if necessary. Including this step in the preparation process promotes accuracy and helps detect errors before they impact actual production.
9. Operator Positioning and Safety Measures – Adjusting the blade gap requires close interaction with the machine and its sharp edges. Operators should position themselves safely, using cut-resistant gloves, safety glasses, and other personal protective equipment (PPE). Ensuring good visibility of the blade and adjustment points reduces the chance of misalignment or injury. A well-prepared operator, aware of the machine’s operational limits, contributes significantly to the precision and safety of the adjustment process.
10. Documentation and Reference Notes – Keeping detailed notes on the previous gap settings, adjustments made, and blade wear patterns can guide future maintenance and adjustment procedures. Preparing reference sheets, including target gap values, torque specifications, and material-specific instructions, ensures that the process is repeatable and consistent. Operators should review these notes before beginning adjustments to confirm alignment with past successful settings and avoid errors caused by misremembered parameters.
11. Environmental Considerations – Workshop conditions such as temperature and humidity can affect both the material and machine dimensions. For example, metal expansion due to heat can alter the effective blade gap, while low temperatures can stiffen hydraulic fluid and affect cylinder responsiveness. Preparing the machine under stable environmental conditions, or accounting for variations in gap calculations, ensures that the adjustments are reliable during actual production.
12. Calibration of Measuring Instruments – All measurement tools, including feeler gauges, dial indicators, and micrometers, should be calibrated before use. This prevents errors caused by worn or misaligned instruments. Operators should verify that gauges are within their specified tolerances, recalibrate if necessary, and ensure consistent readings throughout the adjustment process. Calibration is particularly important when high-precision cuts are required, such as in aerospace or automotive sheet metal fabrication.
13. Confirming Machine Accessibility – The upper blade, blade holders, and adjustment mechanisms must be easily accessible for fine-tuning. Preparation includes clearing obstacles around the machine, ensuring adequate lighting, and arranging tools ergonomically. Restricted access can lead to improper adjustments, uneven gaps, or unsafe handling. By confirming that the machine is accessible before starting, operators can perform adjustments smoothly and accurately.
Step-by-Step Procedure for Adjusting the Blade Gap
Adjusting the blade gap on a hydraulic shearing machine is a critical process that directly affects cutting quality, operational efficiency, and equipment longevity. Achieving precise adjustment requires a systematic, step-by-step approach that combines accurate measurement, mechanical alignment, and careful calibration. The process involves multiple interdependent steps, from initial preparation to final verification, and demands attention to detail, proper tools, and adherence to safety protocols. Below is a detailed, step-by-step procedure for adjusting the blade gap, with technical guidance for each phase.
1. Verify Machine Shutdown and Lockout – Before any adjustment, ensure that the hydraulic shearing machine is completely powered down. Engage lockout/tagout (LOTO) procedures to isolate electrical and hydraulic energy sources, preventing accidental blade movement. Depressurize the hydraulic system by closing valves and relieving residual pressure in cylinders. Confirm that all controls are in the neutral position. Safety during adjustment is paramount, as the blades can exert tremendous force, and unexpected movement can lead to serious injury or damage.
2. Clean Blades and Surrounding Area – Use a lint-free cloth and suitable cleaning agent to remove dust, metal shavings, oil, and oxidation from the blades and cutting area. Even minor debris can interfere with feeler gauge measurements, create uneven gaps, or cause localized blade wear. Ensure the entire work area is free from obstacles and materials that could interfere with adjustment tools or measurements. A clean, well-prepared environment supports accurate and repeatable adjustments.
3. Inspect Blades for Wear and Damage – Examine the upper and lower blades for chipping, deformation, or uneven wear. Use micrometers or calipers to measure blade thickness along the length of the cutting edge. Uneven or damaged blades must be replaced or re-sharpened before attempting gap adjustment, as their condition directly affects measurement accuracy and cut quality. Ensure that both blades are seated properly in their holders and that mounting surfaces are free from burrs or dirt.
4. Check Blade Holder and Guideway Alignment – Using a dial indicator or precision straightedge, verify that the blade holders and guideways are perfectly parallel. Misalignment at this stage will create uneven gaps across the cutting length, resulting in inconsistent shearing and potential machine damage. Adjust blade holders, wedges, or shims to correct any deviation. This step ensures that the adjustment process begins with mechanically stable and correctly aligned components.
5. Gather Tools and Measuring Instruments – Collect all necessary tools, including feeler gauges, dial indicators, torque wrenches, shims, and micrometers. Verify that all instruments are properly calibrated and in good working condition. Accuracy in measurement is essential for achieving the correct blade gap, and using damaged or worn tools can lead to imprecise adjustments, uneven cuts, and accelerated blade wear.
6. Select Appropriate Blade Gap Based on Material Specifications – Determine the recommended blade gap based on the material type, thickness, hardness, and tensile strength. Consult manufacturer charts or CNC machine presets to identify the target clearance, often expressed as a percentage of material thickness (typically 5–10%). For high-precision or high-volume operations, adjust the target gap according to production priorities, balancing cutting quality, blade longevity, and throughput.
7. Initial Blade Gap Measurement – Using a feeler gauge, measure the existing gap between the upper and lower blades at multiple points along the cutting edge. Ensure that the feeler slides smoothly with slight resistance, indicating the correct clearance. Document the current gap measurements to serve as a baseline for adjustments. If the gap is significantly larger or smaller than recommended, the adjustment will require incremental changes combined with repeated measurements.
8. Mechanical Adjustment of Blade Gap – Depending on the machine design, adjust the gap using the blade holder screws, wedge mechanisms, or shims. Make small, controlled adjustments, checking the effect at multiple points along the blade. Avoid large changes at once, as these can introduce misalignment or uneven clearance. Use a torque wrench to secure mounting bolts to manufacturer-recommended specifications, ensuring that the blades remain fixed during operation. Pay attention to mechanical resistance during adjustment; irregular force may indicate misalignment or improper mounting.
9. Check Parallelism After Adjustment – Once the initial mechanical adjustment is complete, use a dial indicator or laser alignment system to verify that the blade gap is uniform along the cutting length. Any discrepancies should be corrected by minor adjustments to wedge screws or shims. Ensuring parallelism is critical, as even a slight tilt or bow can cause one side of the blade to cut more aggressively than the other, increasing wear and producing uneven edges.
10. Fine-Tuning with Feeler Gauges – After mechanical and parallelism adjustments, re-check the blade gap at multiple locations with feeler gauges. This step ensures precise clearance according to material specifications. For high-precision materials, use feeler gauges with resolutions as small as 0.01 mm. Confirm that the feeler slides with consistent resistance across all measurement points, indicating uniform gap distribution. Adjust as necessary until the desired clearance is achieved at every location.
11. Hydraulic System Verification – Re-pressurize the hydraulic system and operate the machine in manual mode without material to check blade movement under real hydraulic load. Observe the stroke, ensuring smooth engagement and release of the blades. Measure system pressure to confirm that it aligns with recommended operational parameters for the selected gap and material type. Any abnormal readings may indicate excessive friction, misalignment, or improper gap setting that must be corrected.
12. Test Cut Procedure – Perform a test cut on scrap material that matches the production material in thickness, hardness, and surface finish. Inspect the cut for edge quality, burr formation, and dimensional accuracy. Use measuring tools such as calipers to verify that the blade is producing the desired cut without deformation or tearing. If the test cut does not meet specifications, make minor incremental adjustments to the blade gap, repeating the test cut until optimal results are achieved.
13. Continuous Monitoring During Initial Production – During the first few production cycles after adjustment, closely monitor cut quality, machine load, and hydraulic pressure. Check for burrs, edge irregularities, or signs of blade binding. Record any deviations and make small adjustments if necessary to maintain consistent cutting performance. Regular monitoring helps identify early signs of misalignment or blade wear that could affect the blade gap over time.
14. Documentation and Recording – Record the final blade gap settings, torque specifications, test cut results, and any adjustments made during the process. Maintaining detailed records allows operators to reproduce successful settings for future production runs and supports preventive maintenance schedules. Documentation also provides reference points for troubleshooting any issues that arise during extended machine operation.
15. Operator Training and Safety Reinforcement – Ensure that all personnel performing blade gap adjustments are trained in proper procedures, tool usage, and safety protocols. Emphasize the importance of using personal protective equipment (PPE), including cut-resistant gloves, safety glasses, and steel-toed boots, especially when handling sharp blades and heavy components. Regular training ensures that adjustments are made consistently, safely, and efficiently across all operators.

Measuring the Gap for Different Metal Thicknesses and Materials
Accurately measuring the blade gap on a hydraulic shearing machine is essential for achieving consistent cutting quality, minimizing wear, and ensuring safety. The process becomes more complex when dealing with varying metal thicknesses and material types, each of which requires specific attention and adjustments. Correct measurement ensures that the shearing force is applied optimally, prevents blade damage, and produces clean, precise edges. Understanding the methodology, tools, and considerations for different metals is critical for any operator aiming for high-quality results.
1. Identifying Material Properties – The first step in measuring the gap is to identify the key properties of the metal being processed, including thickness, hardness, tensile strength, and ductility. Thicker metals require larger blade gaps to accommodate the increased resistance during shearing, whereas thinner metals require smaller gaps to prevent tearing and deformation. Harder metals, such as stainless steel or high-carbon steel, exert greater force on the blades, necessitating a slightly wider gap to avoid excessive wear or chipping. Softer metals like aluminum or copper need a narrower gap to maintain clean edges. Documenting these properties before measurement provides a reference point for selecting the target gap.
2. Selecting Measurement Tools – Accurate gap measurement relies on precise instruments. Feeler gauges are the primary tool, allowing operators to directly measure the clearance between the upper and lower blades. For high-precision materials, micrometers or digital calipers may be used to verify blade thickness and ensure uniform contact. Dial indicators or laser alignment systems help measure gap uniformity along the entire cutting length. Each tool serves a specific purpose: feeler gauges for direct clearance, micrometers for blade condition, and dial indicators for parallelism and uniformity. Using the correct combination ensures accurate measurements across different materials.
3. Establishing the Baseline Gap – Before adjusting the gap for a specific material, operators should measure the existing gap to understand the starting point. Insert the appropriate feeler gauge between the blades at multiple points along the cutting edge. The gauge should slide with slight resistance, indicating the current clearance. Record measurements at the leading, middle, and trailing sections of the blade to detect any variations caused by misalignment, uneven wear, or mechanical deformation. Establishing a baseline allows operators to determine the necessary adjustments to achieve optimal gap settings for each material.
4. Adjusting for Metal Thickness – Blade gap is typically proportional to the material thickness, usually ranging from 5% to 10% of the metal thickness. For example, a 3 mm thick steel sheet may require a 0.15–0.3 mm gap, whereas a 10 mm thick sheet may require 0.5–1 mm. Thicker metals produce greater resistance and require additional clearance to ensure the blades shear cleanly rather than compressing the material. Feeler gauges of the corresponding thickness are used to verify the adjusted gap at multiple points along the blade. Operators must also consider the impact of blade wear, as worn blades may require minor gap compensation to maintain consistent cutting performance.
5. Adjusting for Material Hardness and Type – The hardness and type of metal significantly influence the required blade gap. Hard metals, such as stainless steel, alloy steel, or hardened sheets, require slightly wider gaps to reduce the risk of blade chipping and excessive hydraulic load. Softer metals, like aluminum, brass, or copper, require narrower gaps to prevent tearing and minimize burr formation. When dealing with coated or laminated materials, the blade gap may need to be slightly increased to avoid delamination or surface damage. By measuring and adjusting the gap according to material hardness, operators ensure optimal cutting force distribution and edge quality.
6. Measuring Gap Uniformity Along the Blade – A consistent gap along the blade length is critical for uniform cuts. Use a dial indicator or straightedge to check for parallelism. Measure the gap at multiple points along the leading, middle, and trailing edges. Variations may indicate misalignment, warped blade holders, or uneven wear. Adjust the blade holder screws or wedge mechanisms to correct any discrepancies. Recheck the gap after adjustment to confirm that the clearance is uniform across the entire cutting edge, as even minor variations can affect edge quality and increase localized blade wear.
7. Verifying Clearance with Feeler Gauges – After preliminary adjustments, insert the feeler gauge corresponding to the target gap at multiple locations along the blade. The gauge should slide smoothly with slight resistance at all points. If resistance varies, the gap must be fine-tuned by minor adjustments to screws, shims, or wedges. For high-precision applications, operators may use gauges with increments as small as 0.01 mm to achieve accurate measurements, ensuring that the blades engage the metal evenly during cutting.
8. Consideration for Sheet Coatings and Surface Finish – Materials with protective coatings, paint layers, or laminations require special attention. The blade gap may need to be slightly larger than for uncoated metal to prevent damage to the surface layer. Measure the gap using the feeler gauge while considering the coating thickness, ensuring that the blades do not compress or scratch the material during shearing. For materials with irregular surface finishes, check the gap at multiple locations to account for variations and maintain uniform cutting performance.
9. Accounting for Hydraulic System Variations – The hydraulic pressure affects blade engagement and gap performance. When measuring the gap, operators should consider the pressure at which the system operates. Low hydraulic pressure may allow a slightly wider gap without affecting cutting quality, while high pressure may require a more precise gap to avoid excessive force on the blades and workpiece. During measurement, verify that the hydraulic system is functioning correctly, with smooth cylinder movement and no pressure fluctuations, to ensure accurate readings.
10. Performing Test Cuts and Adjustments – After measuring and setting the blade gap for a specific material, perform a test cut on scrap material that matches the production sheet. Examine the cut edge for smoothness, burr formation, and dimensional accuracy. If the cut quality does not meet specifications, adjust the gap incrementally and repeat the test cut until optimal results are achieved. Record the final measurements, hydraulic settings, and any modifications made during testing to provide a reference for future cuts with the same material.
11. Documenting Material-Specific Settings – Maintaining a detailed record of gap settings for each metal type and thickness improves efficiency and repeatability in production. Include material type, thickness, hardness, target blade gap, feeler gauge used, and hydraulic pressure settings. This documentation allows operators to quickly set the correct gap when switching materials, reducing setup time and minimizing errors. Regularly reviewing and updating these records also supports predictive maintenance and helps identify trends in blade wear or machine performance over time.
12. Ongoing Monitoring During Production – Even after setting and verifying the blade gap, continuous monitoring is essential. During the initial production runs, check the cut quality, hydraulic pressure, and blade condition frequently. Metals with varying thickness along the sheet or differences in hardness between batches may require minor adjustments to maintain uniform performance. Monitoring ensures that the gap remains optimal, reduces scrap rates, and extends blade life.
13. Operator Training for Material-Specific Adjustments – Training operators to recognize differences in metal properties and their impact on blade gap is crucial. Skilled operators can quickly adjust the gap for different thicknesses, coatings, or hardness levels, using feeler gauges, dial indicators, and test cuts effectively. Developing expertise in material-specific measurement techniques ensures consistent cutting quality and reduces trial-and-error adjustments, leading to higher productivity and lower blade wear.


